Showing posts with label Patchwork. Show all posts

Friday, 30 March 2018

Patchwork Project Bag No. 2

Swapping between all my interests I often find myself in a bit of a muddle - Surprise? - No.
On a table next to my armchair in the living room are the DMC threads from my cross stitch, mixed together with my crochet shawl, balls of wool, patterns, scissors, markers etc.
Endlessly trying to be a tidier person I decided to make another project bag in order to separate things.
Of course, then, in my workroom I have fabrics, cutting mats, threads and sewing machine out to make the bag.
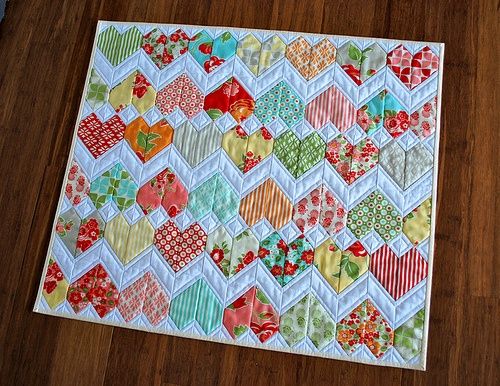
Having lots of scraps of browns and yellows I set about making another in the heart pattern I used before. The bag size is perfect for quilts or knitting as It is almost 20" wide.
I took the cutting mat, wheel and rulers into the kitchen as the worktop height is good to cut standing up, plus the iron and ironing board are there.
Once the hearts were constructed I needed a bigger place to lay them out, and I take them to the dining table.
If you were keeping up with me, I have now taken over four rooms with my stuff!
Project Bag No. 2


The bag is perfect. I put my crochet into it, folded away the ironing board, vacuumed the floors, hide my tools away and yes, I look quite like a tidy person for a while!
Making the bag was also a test for my sewing machine. Only 6 years old and it had become noisy. The needle was never in the centre and sometimes it scared the life out of me as the needle hit the foot and broke with a bang because it had moved over to the left!
It had to have the Step Motor replaced and now works as if it is a new machine, thank goodness.
Now to do something about my knitting needles - they need a bag.
It's Good Friday, I hope it is a good one for you,


Saturday, 3 March 2018

English Paper Pieced Pin Cushion

This is a kit by Sew Motion which I fell in love with and just had to have.
It comes with more than enough fabric and has very clear instructions.


In the past, I have always tacked my papers to the fabric shapes but the kit suggested glue and as my friend glues hers successfully I thought I'd follow suit.
Using 'Sewline' fabric glue pen I glued merrily away. The glue held well and I carefully hand stitched the shapes together.
I then had to remove the papers, this was where the trouble began. The glue held fast.


The only way forward was to keep going but the fabric was becoming frayed despite my trying to slide a pin or the end of my tweezers between the fabric and paper to help release it.
I thought I was going to totally ruin the patchwork.


 The edges had frayed but bits of paper were glued too hard for me to remove without shredding the fabric, so I had to leave them.

It took ages and I was left with a mess.

I carefully folded the turnings inside and as best I could, ironed them down again. I then pinned the patchwork down to the plain fabric very carefully. 
I stitched slowly,  pushing in any ends as I went and I used an even smaller and tighter stitch then I usually would.
Now that it is complete I'm quite happy but will avoid putting pins near the edges of the patchwork for fear of wearing it.
It is large and heavy, as I filled it with ground walnut shells which stops it flipping around and also keeps the pins sharp.

I love the look, I love the vintage 30s fabric.
I shall think twice before using fabric glue again though.


Friday, 1 July 2016

The Patchwork Housewarming Gift

Typical of the problems with moving home, my housewarming gift isn't going to be needed very soon as the prospective purchase of the new home fell through so I was able to slow up on the making and get some much needed jobs done in my own home and just work on the patchwork now and then.
I'm pleased to say that the quilt is now finished!
I only had to buy fabric for the sashing and backing, all the rest was from my rather large stash which incidentally, doesn't seem to have got much smaller!


My quilt worked out 62.5 inches square. This could be made bigger or smaller of course by using more or less squares or widening the sashings.
I sighed with relief when it was finished but got such a thrill to see it as a completed quilt that I started a new design straight away! It's a 'quilt as you go' which starts off very easily but I've given up for a bit now as I came across a tricky bit with the quilting halfway through so it's put away for a while until I think about how to tackle it.
I'll be back with photos of the new work started.

Friday, 27 November 2015

Jelly Roll Quilt

I can't resist Jelly rolls, the colours all blend together so beautifully, I find it hard to choose just one.
I recently had a day with my oldest friend (not in age but in years of knowing each other) and she took me to her local patchwork shop where I was in a frenzy -  deciding what to leave behind, I wanted it all!
I had bought a jelly roll previously from a shop near my sister to make my granddaughter a small quilt but the shop was very tiny and didn't have a great choice of other fabrics.
I'm drawn to fabric shops wherever I go and have got to know where they all are, so I now manage to buy fabric when visiting most of my friends and family!
My 'old friend' Maureen is a patchwork expert and even holds patchwork classes so I was in good hands as she helped me choose fabrics to go with the jelly roll.
This is the Moda Jelly Roll opened and in the process of being cut up!
Maureen recommended a book called Jelly Roll Sampler Quilts by Pam & Nicky Lintott which I bought on Amazon. Naturally I intend to make every quilt in the book but for starters I chose the Classic Sampler Quilt which I've been working on for a few weeks and have now pieced together all the squares and I'm working on the sashing. Hey listen to me, talking the talk!
I did make a mistake straight away with the first square and cut a  pair of triangles wrong as I turned the set square back to front so I moved on to the next square. Patchwork is just that, patches; so I was able to get around the problem with a bit of extra fabric left over at the end. There are several mistakes here and there but even I can't find them now. Maureen hasn't seen it yet though...........
Hopefully a photo of it next week.


Friday, 20 November 2015

Patchwork Cushion - Dresden Plate

I'm a true miniaturist at heart and although I enjoy all kinds of crafts and often start new things, the pull of miniature making is strong and my other projects fall by the wayside.
I did however, finish this Dresden plate cushion which I made for a friend's birthday - and I finished it on time!

It was quick to do and I managed to make it before I lost interest, unlike the quilt I'm putting together for my granddaughter. I'm using a design from the book Jelly Roll Quilts by Pam and Nicky Lintott. I'm working on the Classic Sampler Quilt of 12 different squares, using a pretty Jelly Roll from Moda.
I'll post some photos of my progress next time.
It's Friday again, so enjoy your weekend,

Tuesday, 1 September 2015

Handy Patchwork Bag

With so many projects on-the-go at once I always ended up with carrier bags everywhere and I forget what is in which and it's not a good way to work.
Work bags are a quick and fun way to get into patchwork or try new designs using up the ever expanding stash.
I made this bag which is perfect for any project but would be great for knitting as it's wide enough to take long needles. You can make the bag any size or shape you like.

I had several small pieces of cotton fabric in greens and blues so I just mixed them up randomly with white. When the size was big enough I quilted it with some thin batting and white cotton backing, then simply folded it in half and sewed up the sides, adding some piping to neaten the edge, some handles and a button.
 I use a sewing machine but if you don't have one or you enjoy hand stitching you can still make this.
The idea for the design came from this pretty quilt below which I found on Craftsy and gives the details of how to piece together small rectangles into this stunning heart design without any difficult piecing.
Sort your stash and if you've never tried before, have a go! If you have no stash, small packs of cotton fabrics can be bought on line or at local fabric or hobby shops, if you are lucky to have one nearby. You can cut up old cotton shirts and dresses too!